Sunday, November 30, 2008

homemade background stamp

First choose what you plan to use to make your stamp. I chose Tim Holtz fragments.
I placed them on my contact covered chipboard so the spacing and layout was slightly larger than the moldable foam I was using.
I heated the moldable foam with my heat gun and immediately placed it on my fragments. I pressed down as hard as I could to get the impression for maybe 10 seconds.
When I lifted it up and turned it over this is the impression I was left with.
Here is the stamped image after inking and pressing on white card stock. I like it. Not perfect however, I can see using it on some ATC's for a background. Maybe next time I will choose elements that are a bit thicker to get a more crisp stamp. And if it doesn't turn out that is the good thing about the moldable rubber. You can heat it again with your heat gun and make a different stamp.

Saturday, November 29, 2008

another atc


I call ths atc "Your Place"

heat embossing, my first attempt


I finally decided to try heat embossing. This is my first attempt.

the day after Thanksgiving craft

I started by choosing my papers. I like roosters and chickens.
I cut my papers and cut out all my chickens and rooster
Measuring to be sure my strips are long enough.
I used glimmer mist on my word paper before cutting it into strips. I rubber stamped with my background feather stamp on the word paper and red striped paper to add depth. I don't think from the photo you can see it. I had it all laid out and used modge podge to glue it down. When I laid the rooster and chickens on it I noticed it was missing something so I looked in my stash and found the white and black polka dot paper. It was far too bright for this project so I distressed it with my stamp pad. That made me happy. Since my polka dot paper wasn't long enough I attached a tiny strip of the red to cover the seam. I then attached my rooster and chickens. It was still missing something so I looked through my stash and found some feathers I had purchased a very long time ago for another project. I used modge podge again and glued them down. In between each layer of papers and modge podge I sanded it lightly and wiped with a dryer sheet to remove the dust. I didn't want any bumps. This is my altered clipboard. I have been meaning to make one to hang near my computer with phone numbers and addresses that I didn't want to loose. Now i see I will have to make another as this one will be hung above my scrap table. I plan to add ribbon and as soon as I can find some metal feathers I will attach them to the clip. Thank you for looking!

Wednesday, November 26, 2008

What's for dinner?


It may seem strange to you that I would post a picture of a plate of food. Oh well, I had the craving for liver and onions and made it for dinner. See my plate? I have had the set for over 20 years. I search eBay often to add to my set. The coffee cups and bowls are easy to find and I can find them at a reasonable price. The dinner plates cost a fortune. Fortunately I haven't broken any of my Honorine dinner plates. I just wish I had 4 to 6 more for holiday dinners. Our daughter purchased the set for me one Christmas and I have used these dishes everyday since.

Monday, November 24, 2008

My Soft Flower Embellishment Stash

Remember? I said I had a bunch of this. If you notice to the left of the picture there is my thumb. These are big bags. I just had to find it in my scrap room. If you would like some sample mini zip bags email me and maybe we can trade.

Thanksgiving layouts


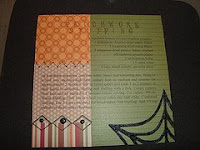
I know Christmas comes after Thanksgiving. I just decided to have my pages ready early and wasn't quite sure what I wanted for the Thanksgiving ones before. Stamped turkey and paper pieced turkey are from my online friends in the scrapbook group I belong to.

Christmas double page layout


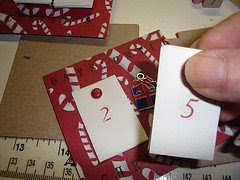
I just finished a double page Christmas layout for a challenge on a scrapbook group I belong to.

"Pollination" ATC


I finally did something with the cute little card I have been saving for some time. I am not sure why I made this it just felt like I needed to put it together.

Saturday, November 22, 2008

Storage Spinner Rack


1- 14.5 ceramic or terracotta pot saucer (without hole) make sure it lies flat when upside down and is wide enough and heavy enough to support the completed rack.

1- 30" threaded lamp rod

1- drill bit for tile and ceramics the exact size of the rod

1- 12.5 inch interior frame from a lampshade

1- 8 inch interior frame from a lampshade

2 large- 2 inch steel washers

a finial of your choice for the top

8 Nuts, 4 washers and 2 lock washers.

clip hooks or safety pins to hand your supplies

Friday, November 21, 2008

Turkey Stuffing Pie

Ingredients:
3 1/2 cups cooked turkey stuffing
1/2 cup turkey or chicken broth
2 tablespoons butter or margarine, melted
1 egg
1/2 cup chopped onion
1 tablespoon oil
2 cups diced cooked turkey
1 cup turkey gravy
2 tablespoons dried parsley flakes
1/2 teaspoon dried thyme
1 cup frozen peas

Directions:

In a large bowl, combine stuffing, broth, butter and eggs; mix well. Press onto the bottom and up the sides of an ungreased 10" pie plate set aside.

In a large skillet, saute onion in oil until tender. Stir in turkey, gravy, parsley, thyme and peas; heat through.

Pour into crust. Bake at 375 degrees for 20 minutes or until golden.

Tuesday, November 18, 2008

My New Stamp


I just haven't had my mind on scrapping a page. I was going through some of my supplies looking for that single (one and only) vintage looking Christmas paper because I wanted to do some bottle cap art. Needless to say after looking for quite a while I didn't find it. I did however find the pack of foam sheets I purchased some time ago. And I thought hmmmm, I wonder if I could cut the stuff with my Cuttlebug and make my own stamp? So, going through my dies I came across the vintage frame one I have had for sometime. I have used it before on some of my scrapbook pages. I thought that would be an interesting stamp and I can see using it over and over. So, I did the normal sandwich and rolled it through my Cuttlebug. Walah it worked. I was so excited and went to the drawer and grabbed the first stamp pad I could put my hands on. It turned out great. I am happy. Now I can mount it on that sticky back stuff like I do with my rubber stamps. The possiblilities are spinning in my head. I have all those swirls and fluorishes I could cut to add those stampings to my pages. I know I probably over explained myself however, I figure in the future I can reread my blog and remind myself how I did it. And I hope I remember not to cut it out of the center of the foam. LOLOL


2009 Calendar Holder


I decided that I wanted to make a holder for my scrapped calendar pages I received in a swap. They were made to fit and be stored in a cd holder however, I wanted mine to hang on the way.


Monday, November 17, 2008

ATC's


I decided to work on a couple ATC's this past weekend.

Saturday, November 15, 2008

Wednesday, November 12, 2008

My Handmade Christmas Tree Stamp


While organizing my scrap room I came across the leftover piece from punching my rubber stamp out of it. My first thought was why did I not throw that away? I looked at it a few moments and had an idea. I wondered if I could make a stamp of my own. I do not have a Christmas tree stamp so I decided to make a simple one for a Christmas card. When it stamped to my satisfaction I decided to try out some micro fine glitter I purchased a few weeks ago. This gives me even more ideas for stamps. All those tiny paper punches I have can be turned into mini stamps when I need just a little something on one of my Scrapbook pages or cards.

paper storage


It took me two days off and on to sort all of my papers and cardstock. I also have small bins for my scraps when I only need a small piece to use in my cuttlebug or cricut.

Tuesday, November 11, 2008

Baby Girl Matchbooks


I have been busy cleaning up my scrap room and sorted through my papers. When I came across these pinks I wanted to make something. This is what I came up with. I used assorted pink papers and card stock inside. It could be used for journaling on a page or a note pad.

Monday, November 10, 2008

Ribbon Storage


I realized I am not using ribbons on my scrapbook pages as much as I use to. I looked at my ribbon storage and realized why. I decided that now is the time to get organized. Here are my before and after pictures. I tried one of those plastic cases with all of the holes. That didn't work. I purchased one of those boxes with the grommets in the sides and that didn't work. So after searching the internet and looking at a lot of ideas that others had come up with, I decided to do this.

Saturday, November 8, 2008

My Cuttle Bug Storage Tin


Lately I want to be organized. Here is my latest attempt. I have all my CuttleBug embossing folders in here. Now what do I do with all those Sizzix folders? I know it isn't fancy however, I believe it will help me be organized.

Thursday, November 6, 2008

Almost CRICUT


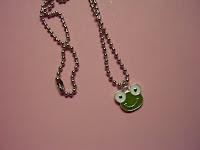
I found this little charm in an assortment pack at our local department store in the jewelry department. Doesn't he almost look like the Cricut logo? I added the ball chain. I plan to mail it to one of my scrapbook friends as a rak.

Wednesday, November 5, 2008

Scrapbook Recipes


I enjoy scrapping recipes. I make a few and trade with others. It gives me the opportunity to try out new techniques.

More Scrapped Recipes


Just a few of the scrapped recipes I have made and traded.

Christmas Secret Santa gifts


It is that time of the year to get busy making Christmas gifts for my scrapbook friends and family. This is what I have made so far.

Monday, November 3, 2008

wedding album


Two more pages of our wedding album completed.

Stamp Storage Album


I have been looking for quite some time for the right storage for my acrylic stamps. I did not want to pay a fortune and I wanted something just like this so I put it together myself. First I cut transparencies (I had a pad I purchased on clearance). Then I dug out one of the 8 by 8 scrapbook albums I purchased on clearance and went to work. I already had a pack of post extenders so I felt I had all I needed. I cut the transparency to fit the album and punched holes to fit the album. I added a post extender to each post. Then I alternated the transparency sheets and page protectors. I inserted pictures of the stamped image on the page protectors and simply placed my acrylic stamps on the transparency so the stamped image was behind it. I believe this is just what I needed to organize those stamps.